

Resetting the Microsoft Authenticator app
If you are unable to access the Microsoft Authenticator app for any reason, you can request a temporary access pass. This allows you to reset two-step verification and regain access to your student account.
Order a temporary access pass
To request a temporary access pass, you will need:
- a computer
- a mobile phone with the ability to install apps
- an e-identification (such as BankID or Freja ID)
Please note: If you do not have an e-identification (e-ID), please contact Student IT for assistance. In exceptional circumstances, Student IT may issue a code for a Temporary Access Pass, which allows you to reset your multi-factor authentication (MFA). The Temporary Access Pass is valid for six hours from the time it is issued.
Doctoral students and employees who do not have an e-ID should instead contact their institution's or department's IDAC administrator.
Important: To request a Temporary Access Pass, you must first raise the assurance level of your KI account.
Used a six-digit code in the Authenticator app?
If you have previously signed in using a six-digit code from Microsoft Authenticator, or if you are unable to reset the app by following the instructions below, you first need to follow these steps:
- Open the Authenticator app
- Click on Karolinska Institutet and your student email address
- Click on the gear icon in the top right-hand corner
- Click on Remove account
- Uninstall the app and install it again
- Follow the instructions below, steps 1-12
Step 1.
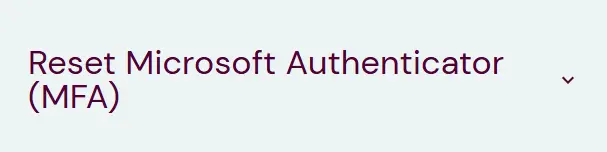
Go to the ID Portal and sign in using your e-identification (e-ID). Then select "Reset Microsoft Authenticator (MFA)".
Click "Request code" and copy the Temporary Access Pass displayed on the screen.
Important: Make sure to copy the code before leaving the page. The Temporary Access Pass is valid for one hour and can only be used once.
Step 2:
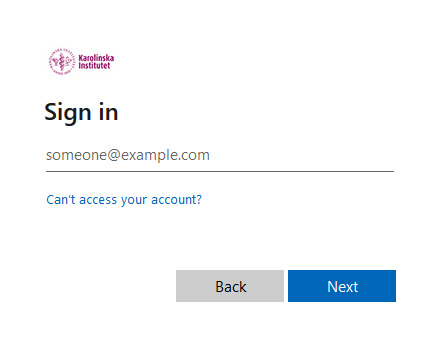
On your computer, sign in to Microsoft 365 using your student email address, then click "Next".
Tip! If you are automatically signed in with another Office account, sign out of Office and try again using your student email address. If you still have problems, try using a private/incognito window or clearing your browser cache before signing in again.
Step 3:
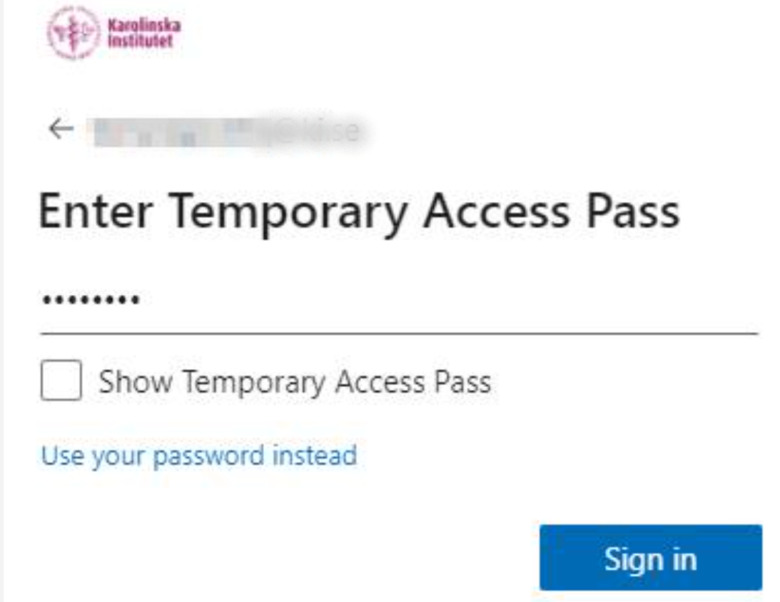
Enter the temporary access pass that you obtained from the ID Portal or received from Student IT, and then click "Sign in".
Can't see this option?
Try using a different browser or opening a private/incognito window.
Step 4:
You should now be signed in and see the Karolinska Institutet logo in the top left corner of the page.
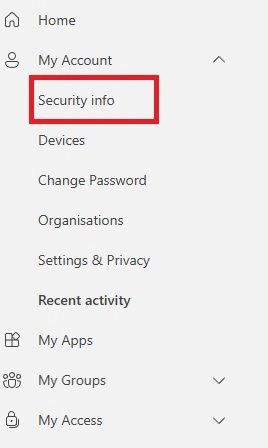
In the left-hand menu, select "My account" and then "Security information" to manage your sign-in and verification methods.
Step 5:
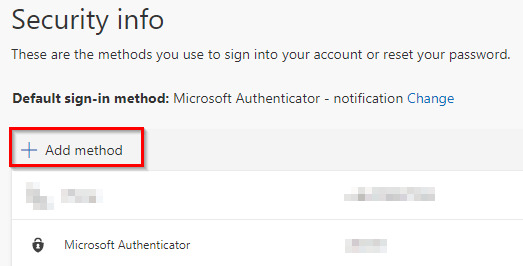
You are now on the Security information page, where you can view and manage your sign-in and verification methods.
Important: Before setting up Microsoft Authenticator again, remove the existing registration by selecting "Delete".

Next, select "Add sign-in method" to add a new verification method to your account.
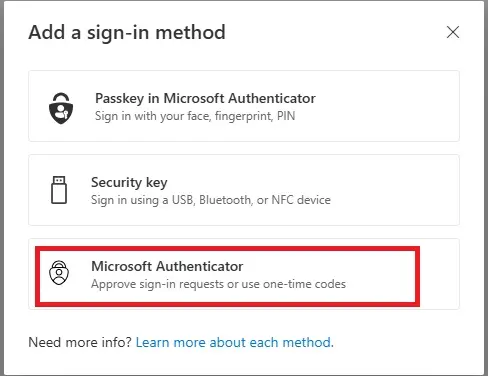
Step 6:
Select Microsoft Authenticator.
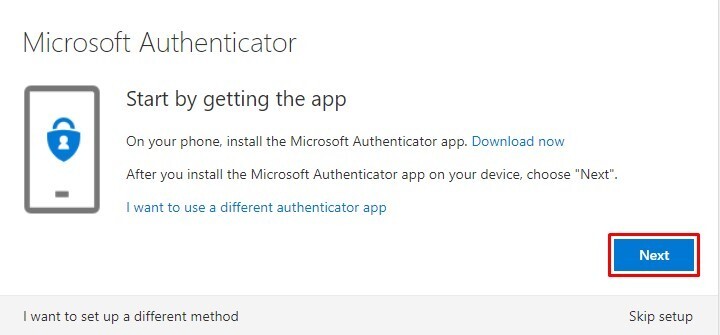
Step 7:
Open the Microsoft Authenticator app on your mobile phone.
If the app is not already installed, download it for free from the Google Play Store (Android) or the App Store (iPhone).
Once the app is open, return to your computer and click "Next".
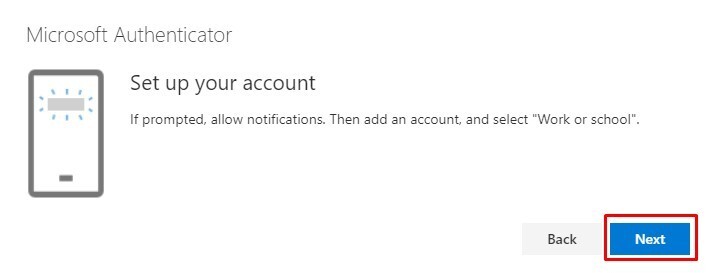
Step 8:
Add your account to the Microsoft Authenticator app.
If this is the first time you have opened the app, you will be prompted to add an account automatically.
Otherwise:
- iPhone: Tap the plus (+) icon in the top-right corner.
- Android: Tap the menu (three dots) in the top-right corner and select "Add account".
On your phone, select "Work or school account". Then return to your computer and click "Next".
Step 9:
On your phone, select "Scan a QR code".
If Microsoft Authenticator asks for permission to access your camera, select "Allow" to continue.
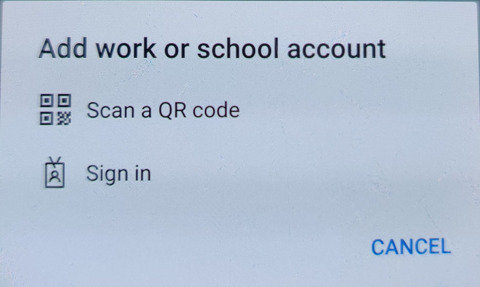
Step 10:
A QR code will now be displayed on your computer screen. Use the Microsoft Authenticator app on your phone to scan the QR code.
The camera should open automatically in the app. If it does not, select "Scan a QR code" in Microsoft authenticator.
Once you have successfully scanned the QR code, return to your computer and click "Next".
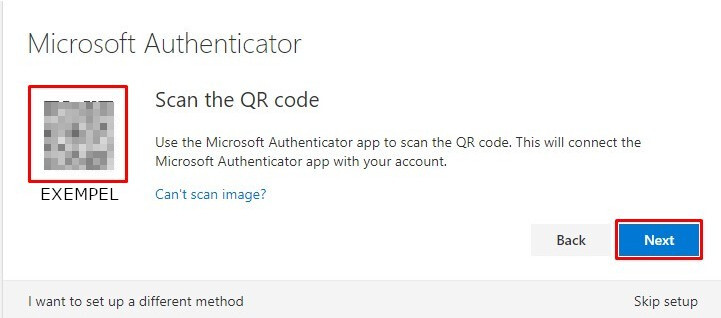
Step 11:
A notification will now be sent to your phone asking you to approve the sign-in request.
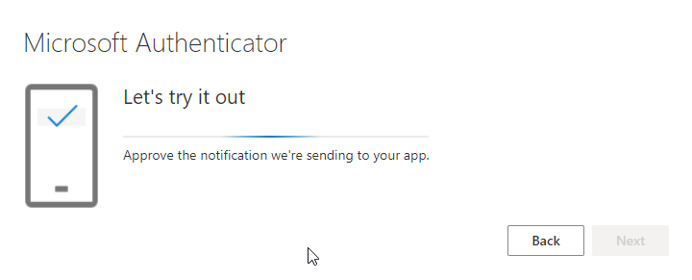
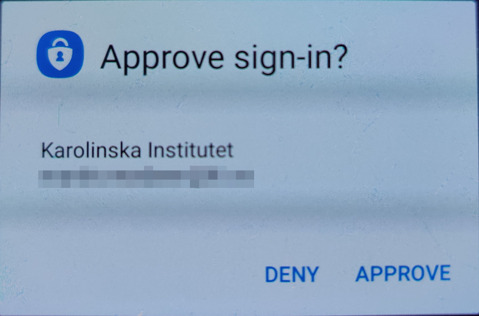
Step 12:
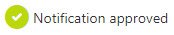
Once you have approved the sign-in request, the message “Notification approved” will be displayed on your computer, confirming that the sign-in was successful.
Click "Next" on your computer to complete the setup.
If everything has been configured correctly, you will see a confirmation message indicating that Microsoft Authenticator has been successfully activated.
For future sign-ins, you may be asked to approve the sign-in request in the Microsoft authenticator app on your phone.
Contact
If you need assistance, please contact Student IT.